Thursday, October 28, 2010

Easy Breezy Egg-less White Cup Cakes

Every-time I am off from work, everyone last a list of tasks for me. Hubby wants me to run some chores, my daughter wants me to plan a play-date with one of her friends and my son wants me to cook something special for him (Didn't I tell you - he is a big foodie ?), while I want to laze around all day. Usually my daughter wins and I end up doing something fun for her. This time my son put his foot down, he needed "White cup cakes"!  Usually we bake chocolate cup cakes, but some how he is bored of them and I had to make something "special" for him.

So I took the easy way out, took my usual chocolate cup cake recipe and skipped the chocolate and add a little bit extra milk and I was done. Also I used the self rising flour and so the cake fluffed up with barely any work on anyone's side! Isn't that a nice project to be done with a young one ? And you should have seen his smile when he saw the puffed up cup cakes in the oven - surely worth the effort (and more) !
Also we tried chocolate chip cookies with this self rising flour and it was a disaster! I guess the lesson is, stick to cakes and cup cakes while using self rising flour!

Ingredients
3 cups of Self rising flour
1/2 cup butter at room temperature
1 1/2 cups milk
 2 tea spoon of vanilla extract
pinch of salt
some chopped nuts or chocolate chip cookies to decorate (optional - my kids didn't allow me to add it)

How To
Pre-heat the oven to 350*F
Mix the dry ingredients (flour and salt) well.
In a bowl, mix the butter and sugar until the mixture changes color. Add the milk and flour alternately to the sugar-butter mixture. Beat well after each addition. Once everything is added, add the vanilla extract and mix well.
Pour into paper lined cup-cake tins and bake for 20-25 min until the tooth-pick inserted comes out clean.
Let it cool a little but, before you dig in!

Enjoy it warm off the oven! If you have any left over for the next day, warm it for 10 seconds in the microwave and Enjoy!

Tuesday, October 12, 2010

Dahi Bara and Aloo dum and Ghuguni

You talk to any Cuttacki (Cuttack is the place where I grew up in Orissa) and they will swear by their dahi bara, aloo dum and ghughuni chat! Ofcourse each local region will have its own favorite. Some will swear by Eshwara's dahi bara, aloo dum and ghughuni chat, while other's will only touch Raghu's dahi bara and Aloo dum and others are purists who love their chandi chowk's dahi bara!

Durga Puja times brings nostalgia and somehow food figures high on my list of happy times during puja. While I cannot claim this dahi bara, aloo dum or ghughuni is authetic, it does get me to a happy mood! My cousin E and her hubby were coming over for lunch and we enjoyed this cuttacki feast! The yummy Aloo dum was made my little sister - and it was real yum.

Pree - this post was inspired by your event  Beyond Five Days of Durga Puja.

For the ghughuni recipe, you can look at my mom's here, or just make your own! While I am not sure of the details on how my sister made the Aloo Dum, you can try a simpler version here.

Ingredients
For the Bara
Urad Dal - 1 cup soaked overnight
fist ful of chana dal soaked overnight with the urad dal
2 -3 green chillies
bunch of coriander leaves
1 inch of ginger - cut into thin slices
Salt to taste
Oil for frying

For the Dahi (Yogurt mixture)
Yogurt - 1 cup
Water - 1 cup (adjust consistency based on taste).
2 table spoon Grated Ginger
1-2 Green chillies cut into thin slices
Black Salt to taste
Sat to taste
Fried and ground cumin seeds
Oil for seasoning
Curry leaves
1 teaspoon of Mustard seeds
pinch of hing

How To make the Dahi Bara
Soak the urad Dal and chana dal over night.
Grind to a rough paste along with the ginger slices, chillies and coriander leaves.
Mix Salt and leave aside in a warm place for 6-8 hrs. (Tip : If in India don't mix salt and leave aside , it is too warm and the Bara becomes too sour. Add salt only before deep frying)

Just before deep frying, get the dahi mixture ready. It is simple, beat the yogurt with salt and black salt.
Once it is a smooth paste, add water and cumin powder and grated ginger and chillies. Taste at this point and adjust any of the above as per your liking.

Season the dahi mixture. Take a small pot, and heat oil in it. Add mustard seeds and hing and curry leaves and pour into the dahi mixture...

Now before you fry the baras, you need to follow one more step. Get a big bowl, fill with warm water and add a pinch of salt and sugar and lemon juice to it.

Once your fry your baras, dung them in this warm water for a few minutes before transferring them to the dahi mixture. This steps keeps the bara's soft and drains out some of the excess oil.


Now the fun starts with dahi baras, eat them as is or make a chat with adding some cuttacki bara maja (mixture  - haldiram's will do, if you can't lay your hands on the original ones), and onions and imli chutney. Look at mine above!

Or eat it as chat with Aloo Dum and Ghughuni. I love my Dahi Bara with Aloo Duma and Ghuguni with chopped onions! How do you like yours ?


Tuesday, September 28, 2010

Paneer Mattar Masala

This month has been a busy month. We have had friends and cousins from India every weekend. This weekend I had my husband's Uncle and Aunt from India. His Aunt is an expert cook and I had to make something special. So I tried this paneer mattar masala from another expert's blog - Rak's blog. The paneer turned out creamy and yummy and we all enjoyed it immensely.

The recipe I followed was quite close to what was on Rak's blog. I just skipped the yogurt and lemon bit! Also the step by step pictures, helped me not burn the onions - key to a yummy gravy!

Sending this recipe off to Priya's every tuesday book-marked event.


Ingredients
1 packet of Paneer - defrosted

1/2 cup of Frozen Peas
2 Tomatoes - diced
3 Green chillies

1 tea spoon of Ginger garlic paste
1/2 tea spoon of Red chili powder
1 tea spoon of Dhaniya powder

1/2 tea spoon of Turmeric powder
pinch of Garam masala powder

Coriander leaves
for garnishing
Salt to taste
2 tablespoon of oil


To Fry and grind to a paste
2 Onion - sliced
1 small Cinnamon
2 Elachi/cardamom
2 cloves
4-5 Pepper
1 tea spoon of oil or ghee


How To

Heat a pan with oil and add the cinnamon, elachi, cloves and pepper.
The add onion and fry till golden brown. Ensure it doesn't burn. (Look at the pictures on her site to know when to stop frying the onions). Cool and grind into a smooth paste.
Shallow fry the frozen paneer with a little bit of oil until it turns golden brown. Remove and keep aside.
Heat a pan, add oil. Once the oil is hot, add green chilies and then ginger garlic paste. Fry for 2 minutes and then add the onion paste from above and let it simmer at low heat for 10-12 min. Keep stirring the paste every few minutes. Keep doing this until oil comes out from the mixture.
Add the salt and red chili powder and dhaniya powder and mix well.


After this add the diced tomatoes and cook well. Add garam masala. Cook until the tomatoes are mushy.
Add the frozen peas and the paneer cook for a few minutes.
Adjust spice level and garnish with coriander leaves. Add some water if you like gravy in your paneer curry.
I love my paneer curry, the next day. You can enjoy it same day or warmed the next day!


Sunday, September 12, 2010

Panasa (Jackfruit) cutlets

Here is panasa cutlet that was made by Sasu (who I would say is the queen of cutlets- she makes them all and makes them awesome). See my earlier post on Soya cutlet and Fish cutlet,  to see what I mean.

Most of the cutlets are similar, but each tastes unique.. This made from fresh jack fruit, tastes just as good as mutton cutlets. No fresh jackfruit, no worries, use the canned ones - they state yummy too!

My in-laws had a huge jackfruit tree in their backyard. So summer months, they had load of panasa delicacies. So while both the sons (my husband and his younger brother) sat reminiscing their childhood days with mom, they remembered this cutlet. My Sasu made this as a farewell dinner for her sons, as she left for India yesterday.


Ingredients
1 can of raw Jackfruit (or panasa in Oriya)
4 small potatoes (peeled)

2-3 green chillies chopped
1 large Onion finely chopped
2 tea spoon of ginger-garlic paste
handful of peanuts (optional)
1 tea spoon of garam masala
1 spring of coriander leaves cut finely (optional)
Salt to taste

Bread Crumbs - as needed
1 cup of Besan
Oil for deep frying

How To
Boil the jackfruit with potatoes and salt until they turn mushy. Once the mixtures cools down, mash the 2 together.

In a nonstick pan fry Onion and ginger-garlic for 2 minutes. Add the peanut and fry well.
Then add the mashed jackfruit and potatoes mashed mixture and fry  for 1-2 minutes. 
Add the garam masala and salt if needed. Mix well and let it cool.
Add the coriander leaves and green chillies and mix well.

In a separate bowl, take the besan, a pinch of salt and pinch of garam masala and mix well.
Add water to make a thick batter and mix well to ensure there are no lumps.
After the jacfruit and potatoes mixture cools, take small portions and shape into oval cutlets.
Dip them in besan batter then roll them in bread crumbs and keep aside.

Fry them and eat them hot off the plate. Enjoy with mint chutney!


Wednesday, September 1, 2010

Summer fun with orange (color)

Its end of summer and wow what a fun filled time it was. Evenings were fun and sunny and warm and spent in the parks or beach. The kids got a restful summer doing nothing and it is all coming to an end. Summer here reminds me of grilled corn and lemonade (kids love making it)... Of course cannot imagine summer without mangoes. So here is my ode to summer color - orange!

The orange juice is freshly squeezed by my kids. Add a pinch of salt to enhance the flavor of the juice. And if the orange is too sour - add a spoonful of sugar and mix well and serve!

The mango ice-cream was made for family friends who have a sweet tooth and are borderline diabetics. So certainly not a very healthy choice but they really enjoyed it. The ice-cream I initially served to them was not really sweet, so I had to add some honey to it while I ate it. I have added some sugar to the recipe here (adjust to taste - since I am putting approximate amounts here). I also made mango milk shake with dollops of the mango ice-cream and it was heavenly...

Ingredients for the mango ice-cream

1 can of unsweetened condensed milk
1 can of mango slices (you can use the sugar syrup if you want, I didn't)
1/2 can of evaporated milk
1/4 cup sugar (optional - use any sweetener of your choice)
1/4 cup of fresh mango sliced into small pieces

How To

Mix the condensed milk, mango slices, evaporated milk, sugar using a blender. Do it in batches if needed.
Put in a container and freeze for 2 hours. Take it out, break the ice crystals and re-freeze. Take it out after an hour, break the mixture again, add the mango slices and put it back to freeze. Let it freeze for 2-4 hrs (depending on the size of the container). Serve chilled!


Enjoy as ice-cream or mix well with milk and enjoy as a mango milkshake!

Sunday, August 15, 2010

International Ghanta

Don't ask me why the name of the dish! This is what we kids used to call this at home -  'International Ghanta'. Maybe it was all the vegetables that was put in it.

Growing up, I used to hate this being made or served at home. Now I think it is a delicacy and prepare for special occasions. As I was talking earlier, my Sasu had gone to visit relatives. The day she came back, I had made this ghanta and tomato khata and dalma, another typical oriya meal. We all had a nice meal together. And yes one of the few meals that I have cooked in the last few months. I have been enjoying the summer and spending time with the kids after work, no major cooking for me! And yes summer is going to end soon and my sasu will be leaving soon too! Sigh!

This is very similar to another ghanta post, I have. Infact the ingredient list is very similar. The only difference is that this was made with Onion garlic and the taste of the dishes (with or without onion garlic) is way different from the earlier ghanta!

Also sending this ghanta  to Priya's event 'Lets sprout' . And a very Happy Independence day! Don't the colors of the veggies remind you of the Indian flag ?

Ingredients


1/2 cup of thinly chopped onions
1/2 cup of diced Potatoes
1 cup of diced Yellow Pumpkin
1/2 cup of Eggplant cut into large chunks
1/4 cup Yam (or saru)
1/3 cup Green beans (use string beans if you have them)
1/2 cup of diced Carrots
1/2 cup of diced Radish
1/2 cup of cut green papaya
few dried mango pieces (ambula)

1 handful of yellow peas soaked in water (2-3 hours)
2 hand full of chick peas (soak and keep for sprouting the day before)
1 handful of Desi Channa (soak and keep for sprouting the day before)
1 handful of green mung Dal (soak and keep for sprouting the day before)

1 tsp of punch puran seeds
1 table spoon of ginger garlic paste

2-3 tablespoon of fried Cumin powder (if freshly roasted and ground then better)
Fresh Coriander leaves
4-5 Red Chillies

4-5 bay leaves
Turmeric powder to taste
Salt to taste
Oil for cooking (you can use ghee if you want too)
Coconut pieces or shredded coconut (optional) - about handful
Ghee - 2 tea spoon (optional)


How to

Put 2-3 table spoon of oil in a frying pan and put the panch phuran seeds and let them splutter.

Add the bay leaves and the red chillies and fry for 1/2 min. Add the onion and fry until it starts changing color.

Add the vegetables that take time to cook (like papaya and radish first). Also add the sprouts and green and yellow peas. And salt and turmeric powder. Cover and cook for 5 min.

Add the ginger-garlic paste and all all other vegetables (other than eggplant and ambula).

Cover and cook in slow fire for about 45-50 min (depending on the quantity of vegetables). Keep mixing and checking every 3-4 minutes.

When all the vegetables are nearly cooked, add eggplant and cook for a few minutes. Add the ambula and ghee and fried cumin powder and cover after turning off the stove.

Garnish with cut corainder leaves and fresh grated coconut (both are optional) and serve.


Saturday, July 31, 2010

Summer feast with Pakhala Bhata

Sorry guys for disappearing for ages... As everyone would have figured out, I am not the most organized person here. So though I love challenges, and new stories/opportunities, they do throw my schedule completely haywire. Suddenly got an opportunity to go Japan for work. Didn't think before saying yes... Of course craziness started after that. All the preparation at work for the trip was keeping me tied up and then home front was busier. Leaving the 2 kids home with MIL was a challenge. I was leaving home without the kids for the 1st time in 9 yrs and it was very different routine for everyone. I think it was toughest on my older one, my little one was happy with extra TV time and pizza for any meals he chose!

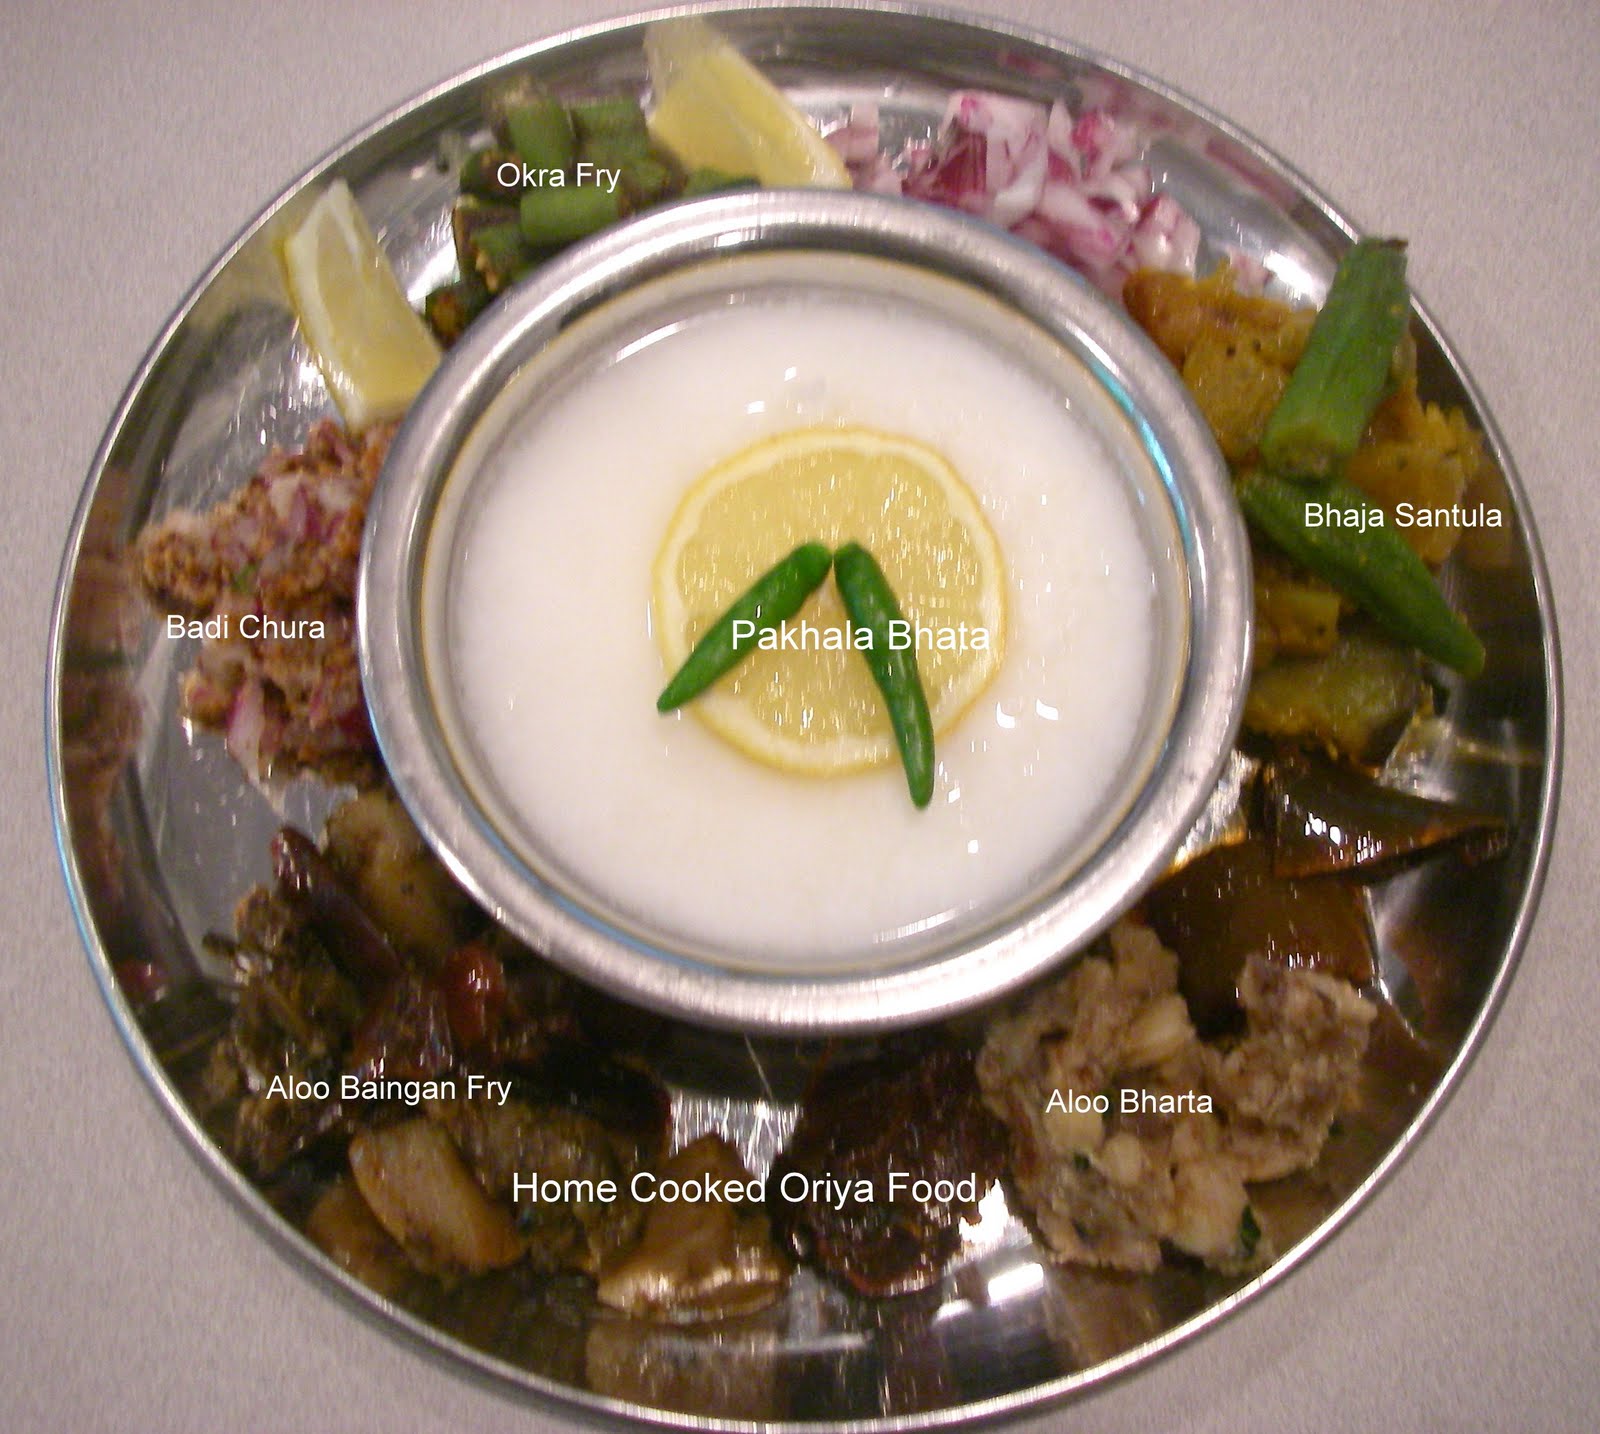
After coming back, there have been other challenges. My MIL had to go meet some relatives and in the mean while, nanny decided to quit. It was craziness at it peak. Finally last Sunday, after we found a nanny and MIL came back, she prepared this pakhala feast for me. This meal was the perfect meal to ground me and bring me back home. A meal to be enjoyed over good conversation at leisure. Pakhala bhata is a day old rice soaked in water with some water, yogurt, salt and green chilies. If you don't have yogurt, substitute with  lemon or use both lemon and yogurt.  It is favored by everyone in Orissa, especially in Summer.

So here is my pakhala bhata with a whole plate full of side dishes. This is how pakhala is enjoyed with several side dishes like Badi chura, Bhaja Santula, Pickles, Aloo Bharta. Make sure crush the green chilies in the rice and water and enjoy! Only thing missing was the fish fry, which usually accompanies a bowl of pakhala. And after eating such a meal, you need a sound round of siesta! So enjoy this feast and see you back soon!

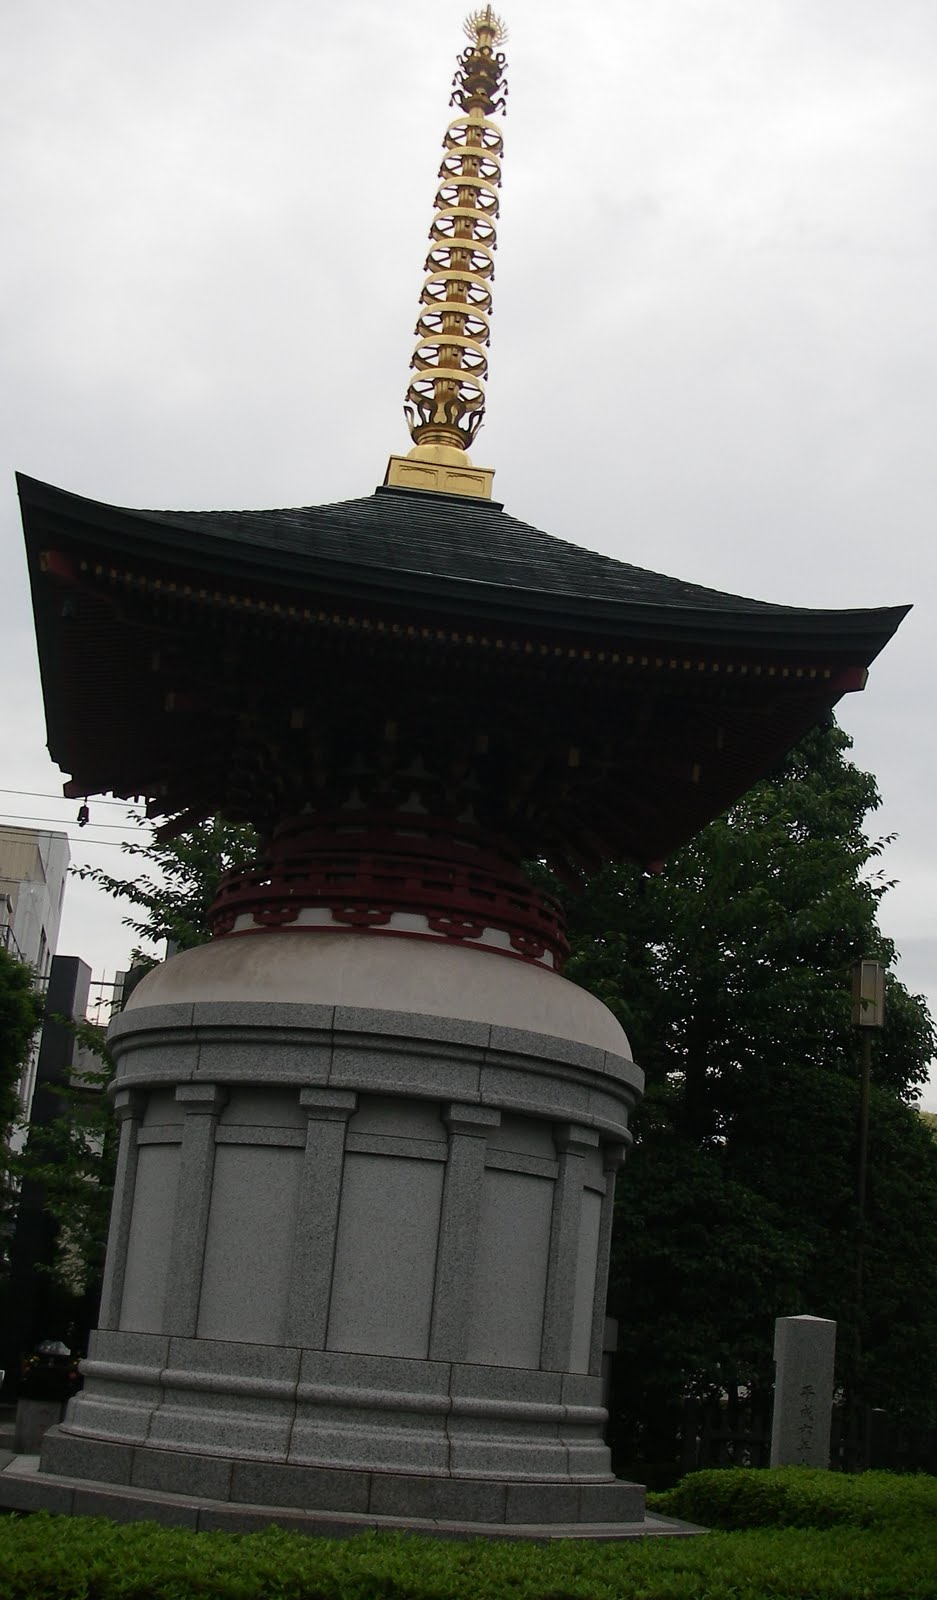
And enjoy some pictures from Tokyo.....